

How to Sharpen Kitchen Knife With Whetstone: Ultimate Guide

Sharpening a kitchen knife with a whetstone is simple and effective. It keeps your knives sharp and ready for any task.
Using a whetstone may seem tricky at first, but it’s easy with a bit of practice. A sharp knife is essential for safe and efficient cooking. Dull knives can slip and cause injuries, while sharp ones make cutting effortless. In this guide, you will learn the steps to sharpen your kitchen knife using a whetstone.
We will cover everything from selecting the right whetstone to mastering the sharpening technique. By the end, you will have a sharp knife and the confidence to keep it that way. Let’s get started on this useful skill!
Choosing A Whetstone
Sharpening your kitchen knife with a whetstone is a skill worth mastering. Choosing the right whetstone is crucial for achieving a sharp edge on your knife. In this guide, we’ll help you understand the different types of whetstones and explain grit levels, so you can make an informed choice.
Types Of Whetstones
Whetstones come in various types, each designed for specific purposes. Here are the main types you might consider:
- Water Stones: These are the most popular type. They require soaking in water before use. They wear down faster but offer a sharper edge.
- Oil Stones: These stones need oil for lubrication. They are more durable and provide a fine edge but take longer to use.
- Diamond Stones: These stones are made with industrial diamonds. They are the hardest and most durable but can be expensive. No lubrication is needed.
- Ceramic Stones: These are very hard and offer a fine finish. They don’t wear down quickly but need no lubrication.
Here’s a quick comparison table for easy reference:
| Type | Lubrication | Durability | Edge Quality |
| Water Stone | Water | Medium | Very Sharp |
| Oil Stone | Oil | High | Sharp |
| Diamond Stone | None | Very High | Sharp |
| Ceramic Stone | None | High | Fine |
Grit Levels Explained
Grit levels indicate the coarseness of a whetstone. Understanding grit levels is key to choosing the right stone for your needs.
Whetstones come with different grit levels, usually indicated by numbers. Here are the main categories:
- Coarse Grit (200-600): Ideal for repairing very dull or damaged knives. This grit removes material quickly.
- Medium Grit (800-2000): Suitable for sharpening and maintaining knives. This grit provides a good balance between speed and edge quality.
- Fine Grit (3000-8000): Used for honing and polishing the knife. It gives the knife a razor-sharp edge and smooth finish.
Here’s a more detailed breakdown:
| Grit Level | Range | Use |
| Coarse | 200-600 | Repairing dull or damaged knives |
| Medium | 800-2000 | Sharpening and maintaining knives |
| Fine | 3000-8000 | Honing and polishing |
By selecting the appropriate grit level, you can ensure your knife stays sharp and effective for all your kitchen tasks.
Preparing The Whetstone
Sharpening a kitchen knife with a whetstone is a traditional method that gives excellent results. Before you start, it’s important to prepare the whetstone properly. This ensures the knife gets a fine edge. Let’s dive into the crucial steps of preparing the whetstone.
Choosing The Best Kitchen Knife – Click Here
Soaking The Stone
Before you start sharpening, you need to soak your whetstone. This helps to release the tiny particles that sharpen the blade. Here’s how to do it:
- Fill a container with enough water to cover the stone.
- Place the stone in the water. Make sure it’s fully submerged.
- Wait for 10-15 minutes. The stone needs to absorb water until no air bubbles come out.
Soaking the stone properly is essential. It prevents the stone from drying out while you sharpen. This ensures smooth sharpening and avoids damage to both the stone and the knife. Once the stone is fully soaked, you’re ready to move to the next step.
Setting Up Your Workspace
Setting up your workspace correctly makes the sharpening process easier and safer. Follow these steps:
- Choose a stable surface. A kitchen countertop or sturdy table works well.
- Place a damp towel under the stone. This keeps it from sliding.
- Ensure good lighting. You need to see the knife’s edge clearly.
- Gather all necessary tools:
- Whetstone
- Knife
- Towel
- Water container
A well-organized workspace reduces the risk of accidents. It also helps you focus on sharpening the knife properly. With your stone soaked and workspace set up, you’re ready to start sharpening your kitchen knife.
Identifying The Knife Angle
Sharpening a kitchen knife with a whetstone is an essential skill for maintaining your tools. One of the key steps in this process is identifying the correct knife angle. The angle at which you hold the knife against the whetstone can significantly affect the sharpness and longevity of your blade. Understanding this angle is crucial for effective sharpening.
Common Angles For Kitchen Knives
Different kitchen knives require different sharpening angles. These angles can vary depending on the type of knife and its intended use. Here are some common angles used for kitchen knives:
- 15 to 20 Degrees: This angle is typical for most Japanese knives. These knives are designed for precision and fine cutting, making them extremely sharp.
- 20 to 25 Degrees: Most Western knives fall within this range. They balance sharpness and durability, making them versatile for various kitchen tasks.
- 25 to 30 Degrees: This angle is often used for heavier knives, such as cleavers. These knives need a robust edge to handle tougher materials.
Using the right angle ensures that your knife performs well and stays sharp longer. If you’re unsure of your knife’s angle, refer to the manufacturer’s guidelines or consult a professional.
| Type of Knife | Common Angle |
| Japanese Knives | 15-20 Degrees |
| Western Knives | 20-25 Degrees |
| Cleavers | 25-30 Degrees |
Using A Guide For Accuracy
Maintaining a consistent angle can be challenging, especially for beginners. Using a guide can help ensure accuracy and improve your sharpening results. Here are some methods to consider:
Angle Guides: These are tools that clip onto your knife blade, helping you maintain a consistent angle. They are especially useful for novices who are still learning the right technique.
Visual and Tactile Cues: If you don’t have an angle guide, you can use visual or tactile cues. For example, you can stack coins or use a matchbook to set your desired angle.
Practice: Consistent practice is essential for improving your technique. Over time, you will develop a feel for the correct angle and be able to maintain it more easily.
- Use angle guides for consistent results.
- Employ visual cues like stacked coins.
- Practice regularly to improve your technique.
Using a guide simplifies the sharpening process and helps achieve better results. Whether you’re a beginner or an experienced cook, these tools and tips can make a significant difference.
Sharpening Techniques
Sharpening Techniques are essential for maintaining the sharpness of your kitchen knife using a whetstone. Understanding the right methods can make a significant difference in the longevity and effectiveness of your blade. Let’s explore two key sharpening techniques: Push vs. Pull Method and Using Even Pressure.
Push Vs. Pull Method
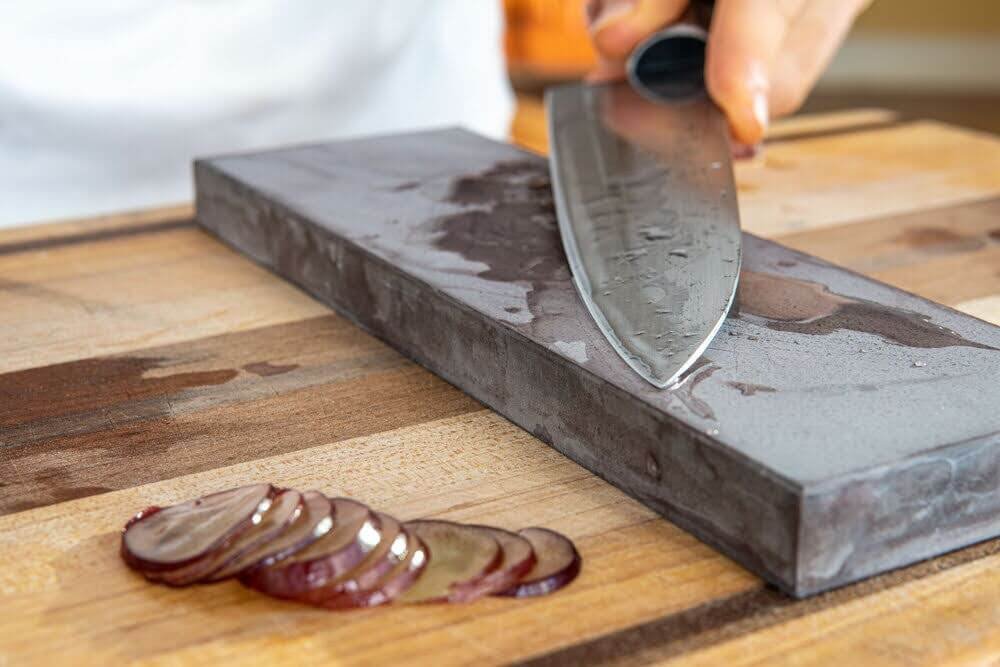
When sharpening your knife with a whetstone, you have the option to use either the push or pull method. The push method involves moving the blade away from your body, while the pull method requires pulling the blade towards you. Both techniques have their merits, but it’s essential to choose the one that feels most comfortable and natural for you.
- Push Method: Suitable for individuals who prefer more control over the sharpening process.
- Pull Method: Ideal for those who find it easier to maintain a consistent angle while sharpening.
| Push Method | Pull Method |
| More control | Consistent angle |
| Requires practice for precision | May feel more natural to some users |
Using Even Pressure
Applying even pressure while sharpening your knife is crucial for achieving a uniform edge. Uneven pressure can result in an irregular blade, impacting its cutting performance. To ensure you are using even pressure:
- Hold the knife at a consistent angle throughout the sharpening process.
- Apply equal pressure along the entire length of the blade.
- Use smooth and controlled strokes to maintain uniformity.
By mastering the art of using even pressure, you can enhance the sharpness and durability of your kitchen knife, making your cooking experience more efficient and enjoyable.
Maintaining The Right Angle
Sharpening a kitchen knife with a whetstone is a valuable skill. It keeps your knives in top condition and ensures safety in the kitchen. One key aspect to focus on is maintaining the right angle. The correct angle is crucial for achieving a sharp, even edge on your knife. This guide will help you master this essential technique.
Keeping Consistency
Consistency is vital when sharpening a knife with a whetstone. Maintaining a steady angle throughout the process ensures that the blade is sharpened evenly. Here are some tips to help you keep the angle consistent:
- Determine the angle: Most kitchen knives require a 15-20 degree angle. Use a protractor or an angle guide to help you find and maintain this angle.
- Use a marker: Draw a line along the edge of the blade with a marker. This line will help you see where the stone is making contact with the blade and ensure you are maintaining the correct angle.
- Visualize: Imagine cutting a thin slice off the whetstone. This mental image can help you maintain a consistent angle.
It is also useful to perform a few practice strokes before you start sharpening. This will help you get a feel for the angle and the motion needed. Remember, slow and steady movements are more effective than fast, erratic ones.
Keep checking your progress by examining the edge of the blade. Look for evenness and consistency. If you notice any irregularities, adjust your angle and technique as needed.
Adjusting Your Grip
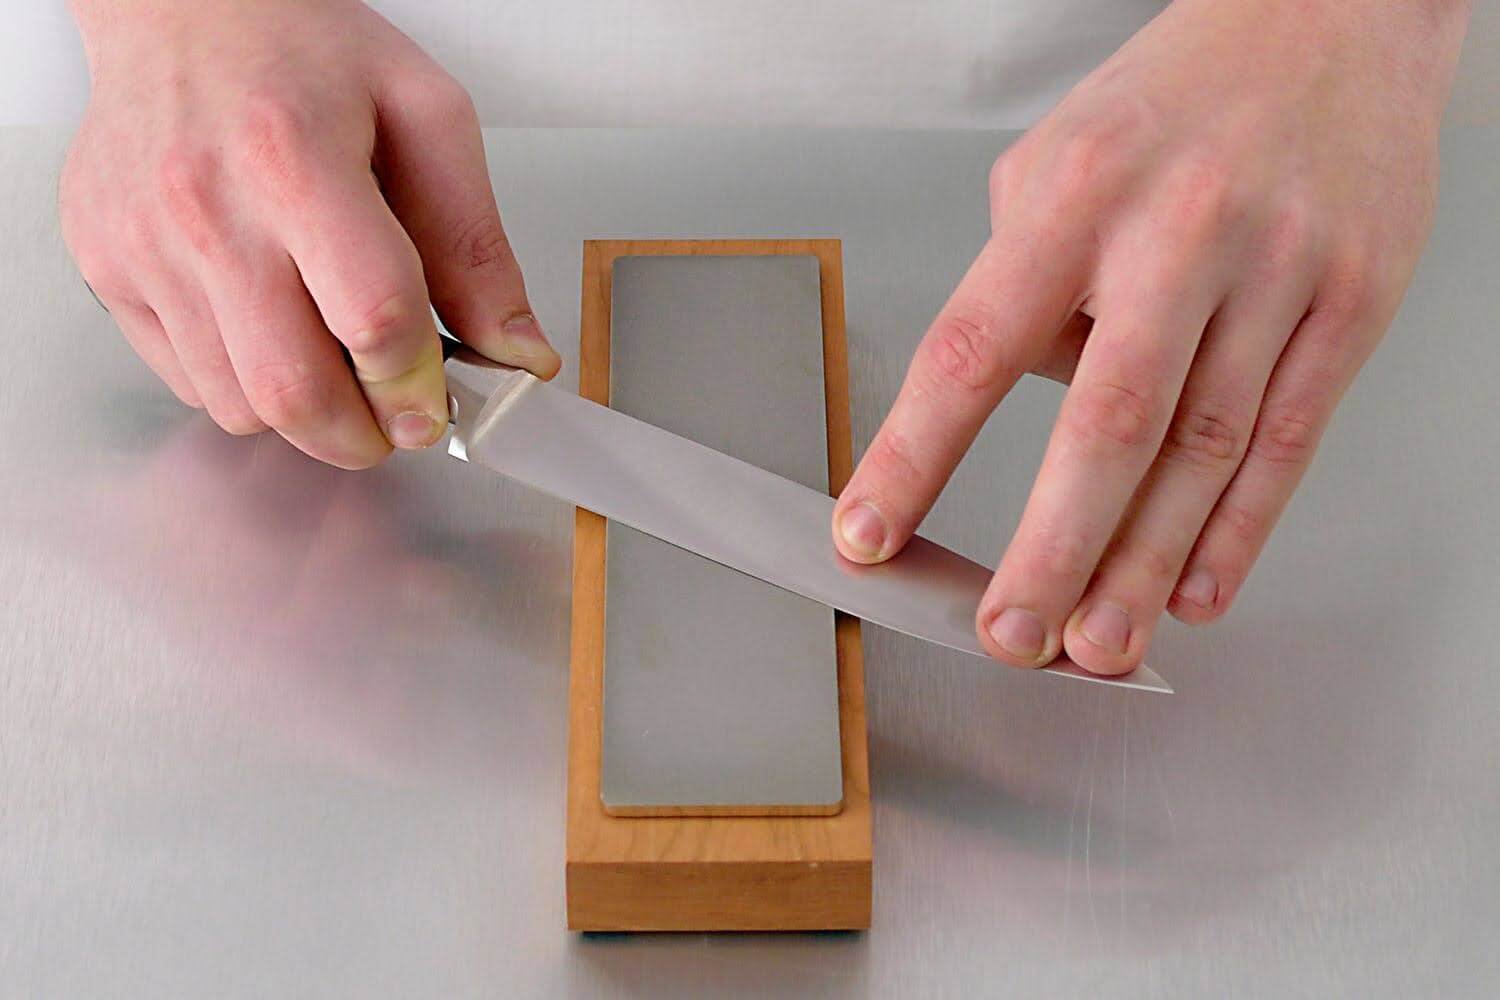
Your grip on the knife and the whetstone can significantly affect the sharpening process. A proper grip ensures control and precision:
- Hold the knife firmly: Use your dominant hand to grip the knife handle securely. Your thumb and index finger should be on opposite sides of the handle, providing a stable hold.
- Support with the other hand: Place your non-dominant hand on the blade, near the spine, for added control. This hand should apply gentle pressure to guide the knife over the whetstone.
- Maintain a comfortable position: Stand with your feet shoulder-width apart. This stance provides balance and allows for smooth, controlled movements.
Adjusting your grip may be necessary as you work through the sharpening process. If you feel any discomfort or lack of control, stop and readjust your grip. Ensuring a proper grip will help you achieve a sharp, even edge without damaging the blade.
Remember to keep your hands dry and free from debris during the sharpening process. Wet or slippery hands can lead to mistakes and potential injury. Use a towel to wipe your hands and the knife handle as needed.
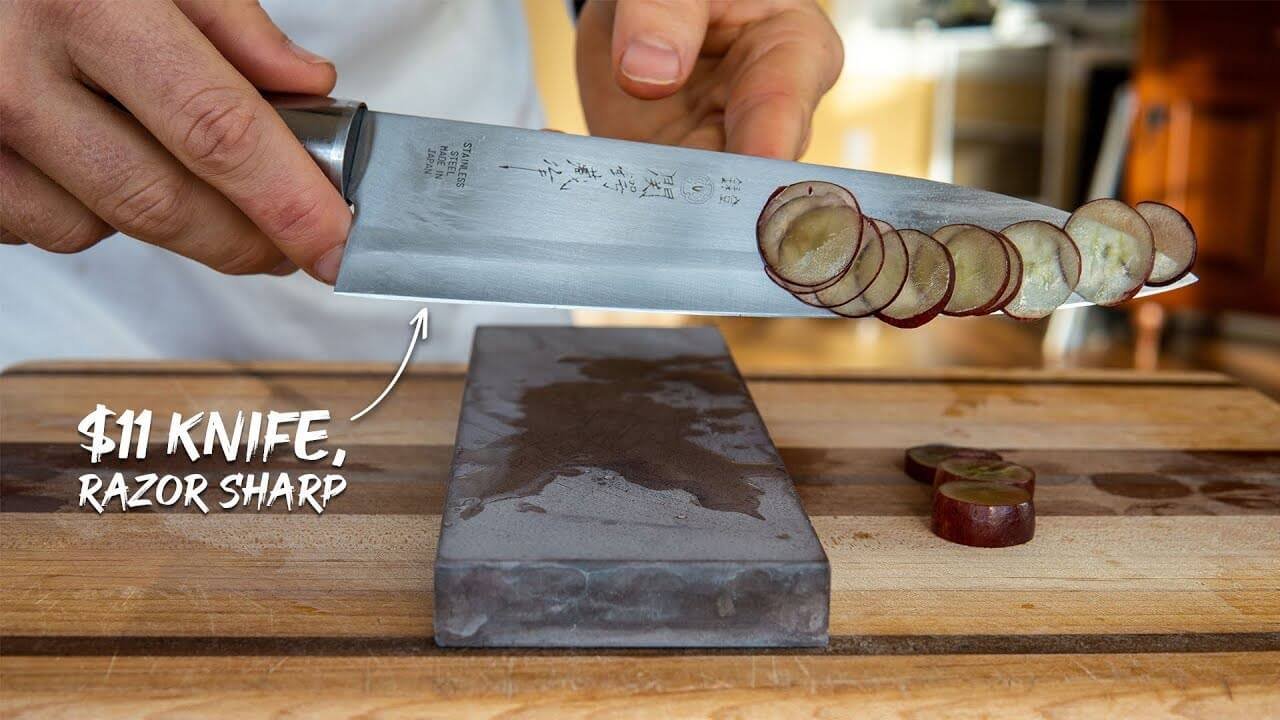
Checking The Edge
After sharpening your kitchen knife with a whetstone, checking the edge is crucial. Ensuring your knife is sharp enough will make your tasks in the kitchen easier and safer. There are a couple of methods to check the sharpness of your knife. Let’s dive into them.
Visual Inspection
First, perform a visual inspection of your knife. This step helps you identify any imperfections. Follow these steps:
- Hold your knife under a bright light.
- Look closely at the edge from different angles.
- Check for nicks, chips, or shiny spots.
If you see any shiny spots, this indicates a dull area. A sharp edge won’t reflect light. Also, ensure the edge is straight and even.
Another technique is to lightly run your thumb perpendicular to the edge. Feel for consistent smoothness. Do not run your finger along the edge to avoid cuts.
Here is a simple table to understand what to look for:
| Inspection Point | What to Check |
| Reflection | No shiny spots |
| Smoothness | Even feel |
| Edge Line | Straight, no nicks |
Paper Test For Sharpness
The paper test is a simple and effective way to check your knife’s sharpness:
- Grab a piece of printer paper or newspaper.
- Hold the paper by one end.
- Place the knife at the top of the paper.
- Gently slice downwards.
A sharp knife will cut through the paper effortlessly. If the knife drags or tears the paper, it needs more sharpening. This test is great because it’s quick and uses everyday materials.
For best results, use different types of paper. Thicker paper may be tougher, while thinner paper shows precise sharpness. Repeat the test until the knife slices smoothly.
Remember, a sharp knife not only makes cutting easier but also safer. A dull knife requires more force, increasing the risk of slipping and accidents.
Finishing Touches
Sharpening a kitchen knife with a whetstone is an art. The finishing touches are crucial in making sure your knife is at its sharpest and safest. These last steps include honing the edge and cleaning the knife. Done right, these steps will give you a clean, precise cut every time you use your knife.
Honing The Edge
Honing the edge is the final step in sharpening your knife. This step smooths out any rough spots on the blade, making it extra sharp. Here’s how to do it:
- First, place your knife on the honing steel at a 15-20 degree angle.
- Next, gently slide the blade down the steel, from the heel to the tip.
- Repeat this action 5-10 times on each side of the blade.
Use light pressure while honing. The aim is to refine the edge, not reshape it. Honing should be done regularly, even if you are not sharpening the knife. It helps maintain the blade’s sharpness.
Consider using a honing rod made of ceramic or steel. Each material has its benefits. Ceramic rods are finer and more delicate, perfect for light honing. Steel rods are more durable and can handle more pressure.
Here’s a quick comparison:
| Material | Benefits |
| Ceramic | Fine honing, delicate, precise |
| Steel | Durable, can handle more pressure |
Remember, honing is about maintenance. It keeps your knife sharp and ready for use. Regular honing saves you from frequent sharpening, extending the life of your blade.
Cleaning The Knife
After sharpening and honing, cleaning the knife is crucial. This step removes any metal particles left on the blade. Here’s how to do it:
- Rinse the knife under warm running water.
- Use a soft sponge and mild dish soap to clean the blade.
- Rinse the knife again to remove soap residue.
- Dry the knife with a soft towel immediately.
Avoid using harsh chemicals or abrasive sponges. These can damage the blade and handle. Also, never leave your knife to air dry. Water can cause rust and weaken the metal over time.
If you want to go the extra mile, you can apply a light coating of food-grade mineral oil to the blade. This helps prevent rust and keeps the blade in top condition.
Here’s a simple cleaning checklist:
- Warm water rinse
- Mild soap wash
- Thorough rinse
- Immediate drying
- Optional: Apply mineral oil
Cleaning your knife properly ensures it stays sharp and safe to use. It also makes your knife last longer, giving you more value for your investment.
Caring For Your Whetstone
Sharpening your kitchen knife with a whetstone can greatly improve your cutting experience. But, it’s equally important to take care of your whetstone to ensure it lasts long and works effectively. Proper care involves regular cleaning and correct storage. Let’s explore how to care for your whetstone.
Cleaning After Use
After using your whetstone, it’s crucial to clean it properly. This helps maintain its effectiveness and extends its lifespan. Here’s how you can clean your whetstone:
- Rinse with Water: Rinse the whetstone under running water to remove metal particles and debris.
- Use a Soft Brush: Gently scrub the surface with a soft brush or sponge. Avoid using harsh brushes that can damage the stone.
- Avoid Detergents: Do not use soap or detergents. They can clog the pores of the stone, reducing its sharpening ability.
- Dry Completely: After rinsing, dry the whetstone thoroughly with a clean cloth. Ensure no moisture remains, as it can cause mold and weaken the stone.
These steps ensure your whetstone remains clean and ready for the next use. Regular cleaning also prevents metal filings from building up, which can dull your knives during sharpening. Keeping your whetstone clean is essential for efficient and effective knife sharpening.
Storage Tips
Proper storage of your whetstone is as important as cleaning it. Storing it correctly prevents damage and keeps it in optimal condition. Here are some tips for storing your whetstone:
- Store in a Dry Place: Always store your whetstone in a dry environment. Moisture can damage the stone and promote mold growth.
- Use a Protective Case: If possible, store the whetstone in a protective case. This prevents dust and debris from settling on the surface.
- Keep Away from Extreme Temperatures: Avoid exposing the whetstone to extreme temperatures. High heat can cause the stone to crack, while freezing temperatures can make it brittle.
- Lay Flat: Store the whetstone flat. This ensures even distribution of weight and prevents warping.
By following these storage tips, you can ensure your whetstone remains in great condition. Proper storage not only prolongs the life of the whetstone but also ensures it remains effective for sharpening your knives.
Frequently Asked Questions
What Is The Best Angle To Sharpen A Kitchen Knife?
A 20-degree angle is ideal for most kitchen knives. It balances sharpness and durability.
How Long Does It Take To Sharpen A Knife With A Whetstone?
Sharpening a knife usually takes about 5-10 minutes. It depends on the knife’s condition.
Do I Need To Soak The Whetstone Before Use?
Yes, soak your whetstone in water for 10-15 minutes. This ensures effective sharpening.
Conclusion
Sharpening your kitchen knife with a whetstone can be simple. Follow the steps carefully. Practice makes perfect. A sharp knife makes cooking more enjoyable and safe. Remember, patience is key. Keep your whetstone clean and flat. Regular maintenance extends your knife’s lifespan.
Take your time and sharpen often. Happy cooking!

Sebastian D’souza is a leading expert in home and kitchen appliances, dedicated to transforming everyday living with high-quality, stylish, and innovative solutions. As the founder of De Studio Home, our passion for design and functionality, sustainability drives us to curate the best products for modern homes. Our commitment to excellence ensures that every customer enjoys a perfect balance of practicality and elegance in their living spaces.