

How to Sharpen a Kitchen Knife With a Rod: Expert Tips

Sharpening a kitchen knife with a rod is simple yet effective. It keeps your knives sharp and safe to use.
A dull knife is not only frustrating but also dangerous. Sharp knives make cooking easier and more enjoyable. Using a sharpening rod is a quick way to maintain your knives. This tool, also known as a honing rod, helps keep the blade’s edge straight.
This method is perfect for both novice and experienced cooks. In this guide, you’ll learn how to use a rod to sharpen your kitchen knife. With a few steps, you can keep your knives in top condition. Ready to make your kitchen tasks smoother? Let’s get started on sharpening your knife with a rod.
Importance Of Sharp Knives
Keeping your kitchen knives sharp is essential for both safety and efficiency. A dull knife can cause accidents and make cooking a tedious task. Knowing how to sharpen a kitchen knife with a rod is a valuable skill. In this guide, we will discuss the importance of sharp knives and provide detailed steps on how to sharpen your kitchen knife with a rod.
Benefits Of Sharp Knives
Sharp knives offer numerous benefits in the kitchen, making them indispensable tools. A well-maintained sharp knife can enhance your cooking experience in many ways:
- Effortless Cutting: Sharp knives require less force to cut through ingredients, making the task easier and more efficient.
- Precise Slices: They provide cleaner cuts, preserving the integrity and appearance of your food.
- Improved Flavor: Sharp knives cause less damage to food cells, preserving the natural flavors and textures.
- Time-Saving: With a sharp knife, you can complete chopping and slicing tasks much faster.
Consider the following table to understand the difference between using a sharp knife and a dull knife:
| Sharp Knife | Dull Knife |
| Requires less force | Requires more force |
| Cleaner cuts | Ragged cuts |
| Maintains food structure | Crushes food |
| Reduces prep time | Increases prep time |
Safety Considerations
Safety is paramount when using sharp knives. While it might seem counterintuitive, sharp knives are actually safer than dull ones. Here are key safety considerations:
- Less Slippage: Sharp knives cut smoothly, reducing the risk of slipping and causing an accident.
- Controlled Movements: They allow for better control, making precise cuts easier.
- Reduced Fatigue: Using a sharp knife means less effort, reducing hand and wrist strain.
Follow these safety tips to ensure a safe cutting experience:
- Always use a stable cutting board.
- Keep your fingers tucked in while cutting.
- Store knives properly, ideally in a knife block or on a magnetic strip.
- Regularly maintain your knives by sharpening them with a rod.
By keeping your knives sharp and following these safety practices, you can create a safer and more enjoyable cooking environment.
Types Of Kitchen Knives
Sharpening your kitchen knives with a rod is a vital skill to keep your tools in top condition. Knowing the different types of kitchen knives helps you understand how to handle and sharpen each one effectively. Each knife has its own purpose and sharpening needs, making it essential to recognize them. Let’s dive into some common types of kitchen knives.
Chef’s Knife
The chef’s knife is a versatile tool in every kitchen. It is ideal for a range of tasks including chopping, slicing, and mincing. This knife typically has a broad blade that tapers to a point, measuring 8-10 inches in length. The chef’s knife’s weight and balance make it perfect for heavy-duty tasks.
Here are some features of a chef’s knife:
- Blade Length: Usually 8-10 inches
- Blade Shape: Broad and tapers to a point
- Uses: Chopping, slicing, dicing, and mincing
- Material: Often made from stainless steel or carbon steel
Sharpening a chef’s knife with a rod involves holding the rod vertically with the tip resting on a cutting board. Hold the knife at a 20-degree angle to the rod. Use smooth, gentle strokes to move the knife from the heel to the tip along the rod. Repeat on the other side of the blade. Consistent practice ensures a sharp and effective edge.
Paring Knife
The paring knife is another essential in the kitchen. It is small and lightweight, perfect for detailed tasks that require precision. This knife is typically 3-4 inches long, making it ideal for peeling, trimming, and intricate cutting.
Key characteristics of a paring knife include:
- Blade Length: Usually 3-4 inches
- Blade Shape: Straight or slightly curved
- Uses: Peeling, trimming, and detailed cutting
- Material: Often made from stainless steel
To sharpen a paring knife with a rod, hold the rod vertically on a cutting board. Hold the knife at a 15-degree angle to the rod. Slide the blade from the heel to the tip along the rod using gentle strokes. Repeat on the other side of the blade. Regular sharpening keeps the paring knife precise and ready for intricate tasks.
Choosing The Right Sharpening Rod
Sharpening a kitchen knife with a rod is a skill every home cook should master. Choosing the right sharpening rod is crucial for maintaining your knives’ longevity and efficiency. The right rod ensures that you can keep your blades sharp and ready for any culinary task. Let’s explore the key factors you should consider while selecting the perfect sharpening rod.
Material Types
Sharpening rods come in various materials, each offering different benefits. Understanding these materials can help you choose the best rod for your needs.
Ceramic rods are popular for their fine grit, which creates a very sharp edge. They are ideal for regular maintenance but can be brittle and prone to breaking if dropped.
Steel rods are the most common. They are durable and come in two main types:
- Honing steel: Aligns the knife’s edge without removing much material. Best for daily use.
- Sharpening steel: Has a coarser surface to remove metal and sharpen the blade. Suitable for less frequent use.
Diamond rods have a diamond coating, making them the hardest and most abrasive. They are efficient for quickly sharpening very dull knives but can wear down blades faster.
Here’s a quick comparison table:
| Material | Benefits | Drawbacks |
| Ceramic | Fine grit, very sharp edge | Fragile, can break easily |
| Steel | Durable, versatile | May not sharpen as finely as ceramic |
| Diamond | Very hard, sharpens quickly | Can wear blades down faster |
Length And Thickness
The length and thickness of the sharpening rod also play a crucial role in its effectiveness.
Length is important because a longer rod provides more surface area for sharpening. Most rods are between 8 to 12 inches long. A longer rod is better for larger knives, while a shorter rod may suffice for smaller blades. Here’s a simple guideline:
- 8-inch rod: Suitable for small to medium knives (under 8 inches)
- 10-inch rod: Versatile, good for most kitchen knives
- 12-inch rod: Best for larger knives (over 10 inches)
Thickness affects the rod’s durability and the sharpening process. A thicker rod is more durable and less likely to bend or break. It provides a more stable surface for sharpening, but it may be heavier and harder to handle. Thin rods are lighter and easier to maneuver but can bend or break more easily.
Consider your knife collection’s size and your comfort level with handling different rod sizes when choosing the right length and thickness.
Preparing Your Knife
Sharpening a kitchen knife with a rod can bring your dull blades back to life. Before you begin, it is crucial to prepare your knife properly. This ensures effective sharpening and prolongs the life of your knife. The preparation involves cleaning the blade and inspecting it for any damage. Let’s explore these steps in detail.
Cleaning The Blade
Before sharpening, always clean your knife. This removes any food residue, oils, or other debris that may interfere with the sharpening process. A clean blade ensures smooth and even sharpening.
Here’s how you can clean your knife:
- Use Warm Soapy Water: Mix a few drops of dish soap with warm water. Use a soft sponge to gently scrub the blade.
- Rinse Thoroughly: Make sure to rinse off all soap to prevent any residue from being left on the blade.
- Dry the Blade: Use a clean, dry cloth to wipe the blade. Ensure it is completely dry to avoid rusting.
Some tips to keep in mind:
- Avoid using abrasive cleaners or scrubbers. They can scratch the blade.
- Do not soak the knife in water for long periods. This can damage the handle and the blade.
- Always handle the knife carefully while cleaning to avoid any accidents.
Proper cleaning makes the sharpening process more effective and helps maintain the blade’s integrity.
Inspecting For Damage
After cleaning, inspect the knife for any damage. This step ensures the blade is in good condition and ready for sharpening. Look for signs of wear, such as chips, cracks, or bends.
Here’s a quick inspection guide:
- Check for Chips: Run your finger gently along the edge of the blade. Feel for any nicks or chips.
- Look for Cracks: Examine the blade under a bright light. Look for any visible cracks along the edge or surface.
- Inspect for Bends: Hold the knife at eye level and look down the length of the blade. Ensure it is straight and not bent.
If you find any damage, consider the following solutions:
| Type of Damage | Solution |
| Small Chips | Use a sharpening stone to smooth out the edge before using the rod. |
| Cracks | If the crack is significant, it may be time to replace the knife. |
| Bends | Gently straighten the blade with a soft mallet and a flat surface. |
Inspecting for damage ensures the knife is safe to use and will sharpen properly. Addressing any issues beforehand prevents further damage during sharpening.
Proper Grip Techniques
Sharpening a kitchen knife with a rod is a skill that can significantly improve your cooking experience. Proper grip techniques ensure safety and efficiency. Let’s delve into how to hold the knife and maintain the right posture for the best results.
Hand Position
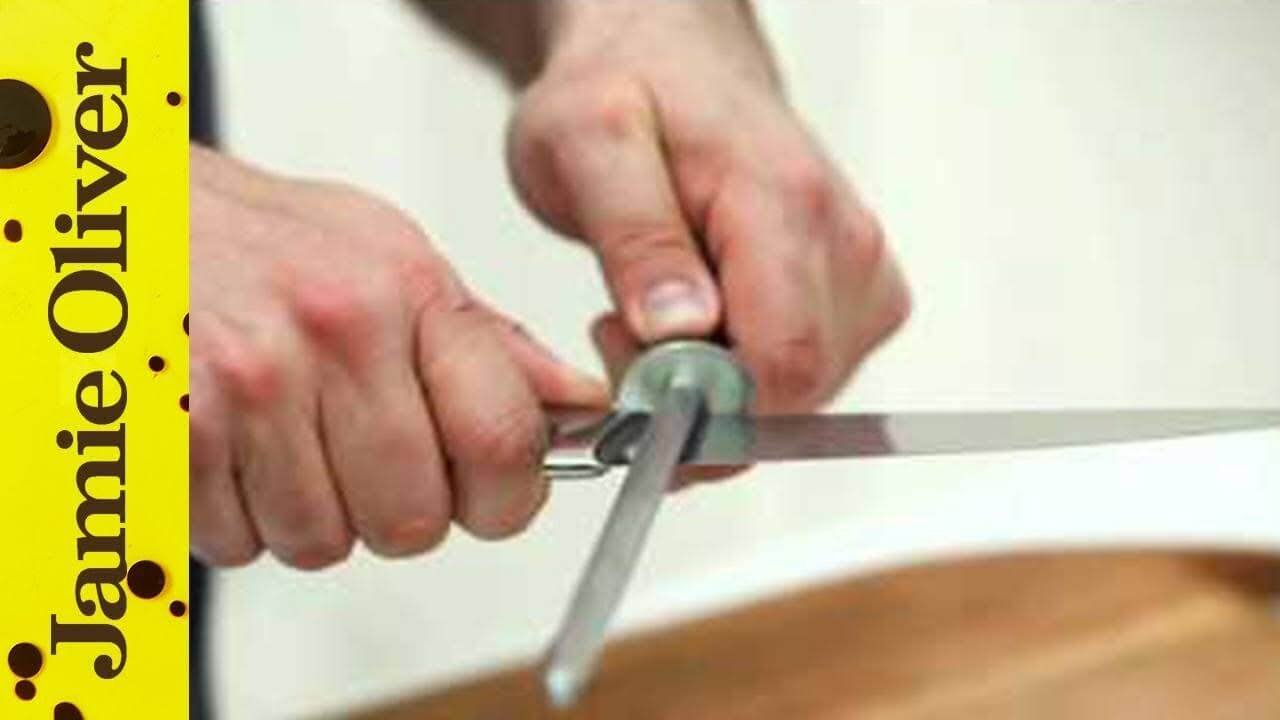
Proper hand position is crucial for effective knife sharpening. Start by holding the sharpening rod firmly in your non-dominant hand. Keep the rod vertical, with the tip resting on a sturdy surface. This provides stability.
With your dominant hand, grip the knife’s handle securely. Your thumb should rest on one side of the handle, while your fingers wrap around the other side. Ensure your grip is firm but not too tight to avoid strain.
To guide the blade, place your index finger along the spine of the knife. This helps control the angle and pressure. Maintain a consistent angle of around 20 degrees between the blade and the rod. This angle is essential for effective sharpening.
Consider these points for a proper hand position:
- Hold the rod vertical and stable.
- Grip the knife handle firmly with your dominant hand.
- Place your index finger on the spine for control.
- Maintain a 20-degree angle between the blade and the rod.
Following these steps ensures you sharpen the knife efficiently while minimizing risks.
Body Posture
Body posture is equally important for safe and effective knife sharpening. Stand with your feet shoulder-width apart. This stance provides balance and stability. Avoid leaning too far forward or backward.
Keep your shoulders relaxed. Tension can affect your control and precision. Stand close enough to the rod so you can comfortably reach it with the knife. This helps maintain a steady hand and consistent angle.
Ensure your elbows are slightly bent. This allows for smooth, controlled movements. Keep your movements slow and deliberate. Rushing can lead to mistakes and potential injuries.
Remember these key points for proper body posture:
- Stand with feet shoulder-width apart.
- Relax your shoulders.
- Stand close to the rod for comfortable reach.
- Keep elbows slightly bent.
- Move slowly and deliberately.
Maintaining the right body posture helps you sharpen your knife effectively and safely. It also reduces fatigue, allowing you to complete the task with ease.
Sharpening Angles Explained
Sharpening a kitchen knife with a rod can seem tricky, but understanding the correct angle makes it easier. The angle at which you hold the knife against the rod is crucial. This angle affects how sharp and durable your knife will be. Let’s delve into the details of sharpening angles.
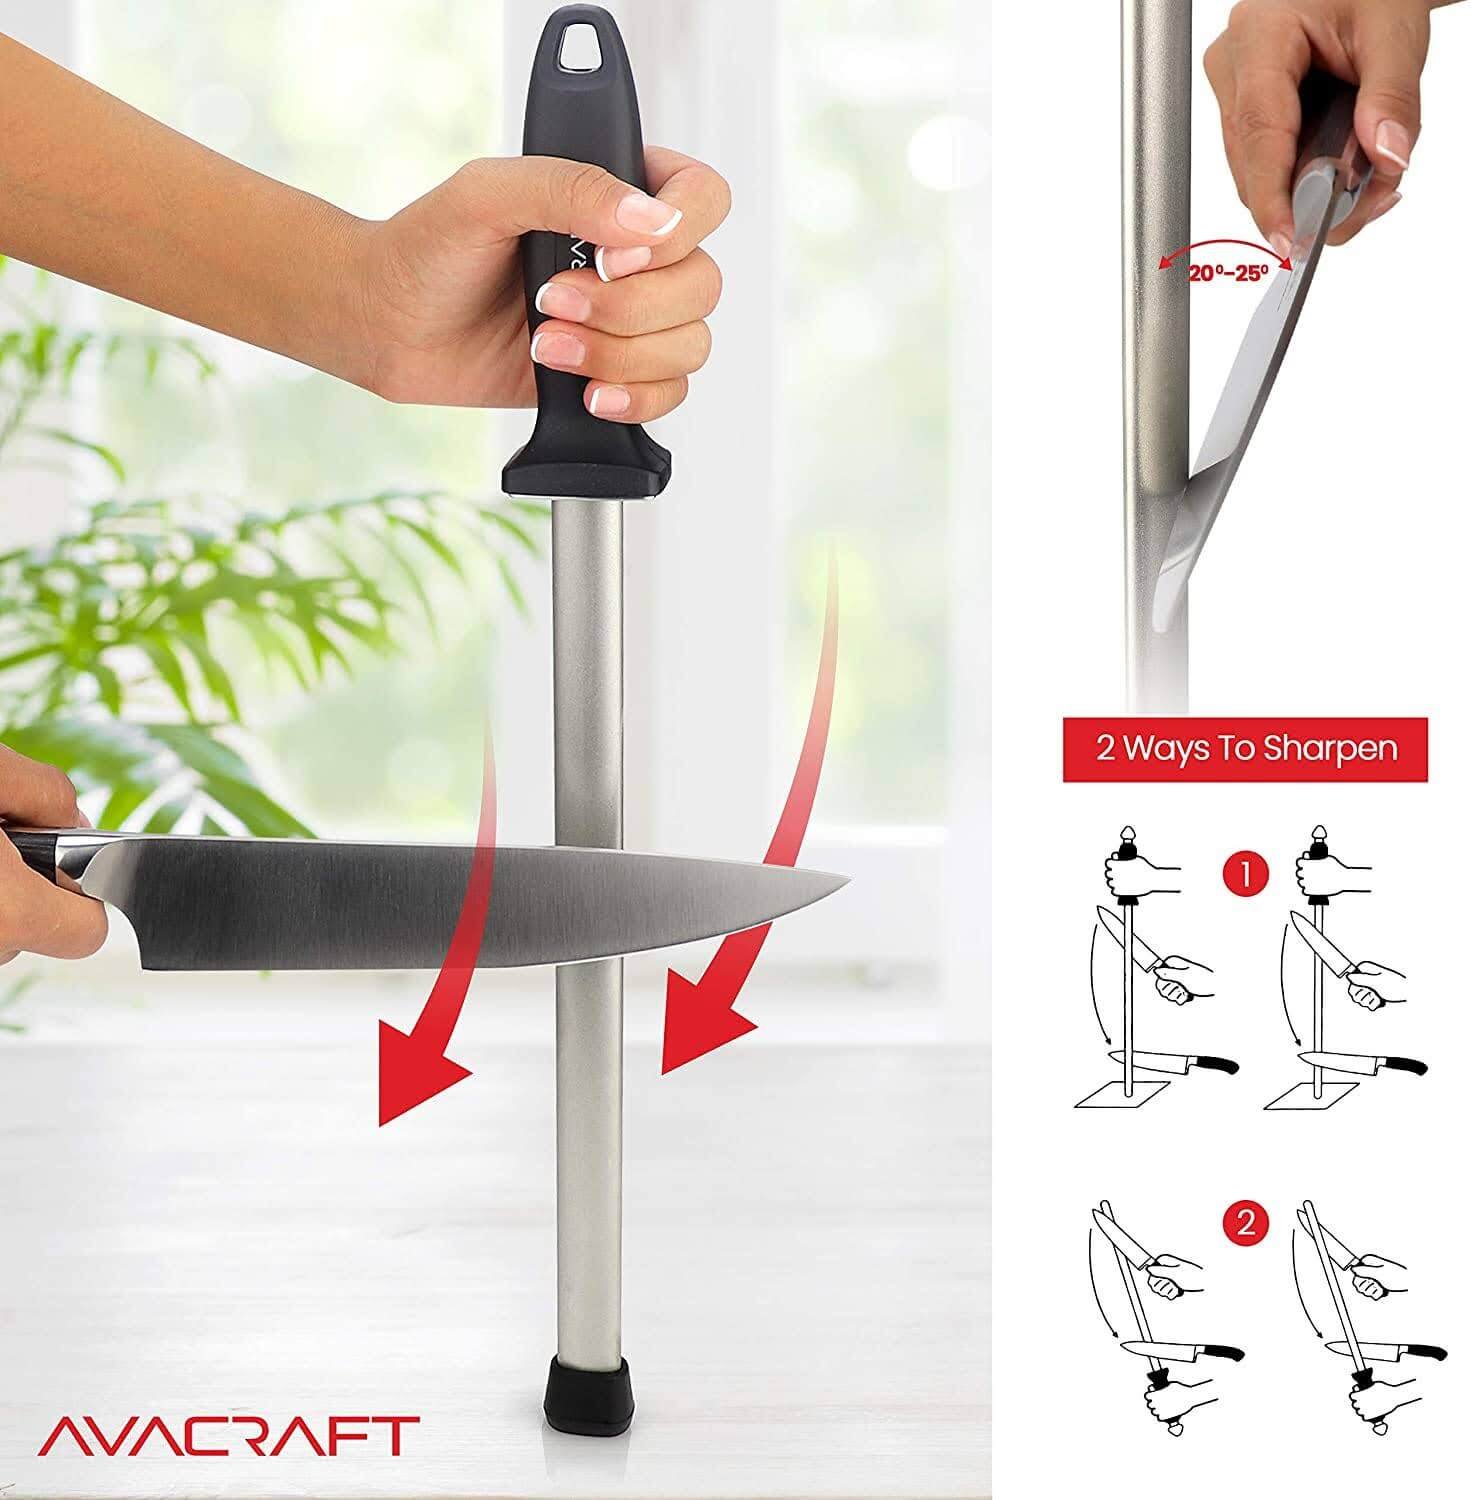
Common Angles
When sharpening a kitchen knife, the angle you choose is important. Most kitchen knives are sharpened at angles between 15 and 20 degrees. These angles offer a good balance between sharpness and durability.
Here are some common angles and their uses:
- 15 Degrees: This angle is often used for Japanese knives. It creates a very sharp edge but can be less durable.
- 20 Degrees: This angle is common for Western knives. It offers a balance between sharpness and edge retention.
- 25 Degrees: This angle is used for knives that need a stronger edge, like hunting or outdoor knives.
To maintain these angles, practice is key. You can also use angle guides to help you keep the correct angle. Here’s a quick reference table:
| Angle | Type of Knife | Pros | Cons |
| 15 Degrees | Japanese Knives | Very sharp edge | Less durable |
| 20 Degrees | Western Knives | Good balance | May need more frequent sharpening |
| 25 Degrees | Outdoor Knives | Strong edge | Less sharp |
Adjusting For Different Knives
Different knives require different angles. Japanese knives, for example, are usually sharpened at a steeper angle than Western knives. This means you need to adjust your sharpening technique based on the knife you are working with.
For a Japanese knife:
- Hold the knife at a 15-degree angle.
- Use gentle, consistent strokes.
- Check the edge frequently.
For a Western knife:
- Hold the knife at a 20-degree angle.
- Apply moderate pressure.
- Ensure even sharpening on both sides.
Honing rods can also differ. Ceramic rods are great for fine sharpening, while steel rods are better for maintaining the edge. Using the right rod for your knife type can make a big difference.
Here’s a quick guide:
| Type of Knife | Recommended Angle | Best Honing Rod |
| Japanese Knife | 15 Degrees | Ceramic Rod |
| Western Knife | 20 Degrees | Steel Rod |
| Outdoor Knife | 25 Degrees | Diamond Rod |
Remember, practice makes perfect. The more you sharpen, the better you will understand the angles and techniques that work best for your knives.
The Sharpening Process
Sharpening a kitchen knife with a rod is a skill every home cook should know. A sharp knife makes food preparation faster and safer. The sharpening process may seem daunting, but with the right steps, anyone can do it. Here’s how to sharpen your kitchen knife with a rod efficiently.
Step-by-step Guide
Follow these steps to sharpen your kitchen knife with a rod:
- Choose the right rod: Select a honing rod made of ceramic or steel. Ensure it is longer than the blade you are sharpening.
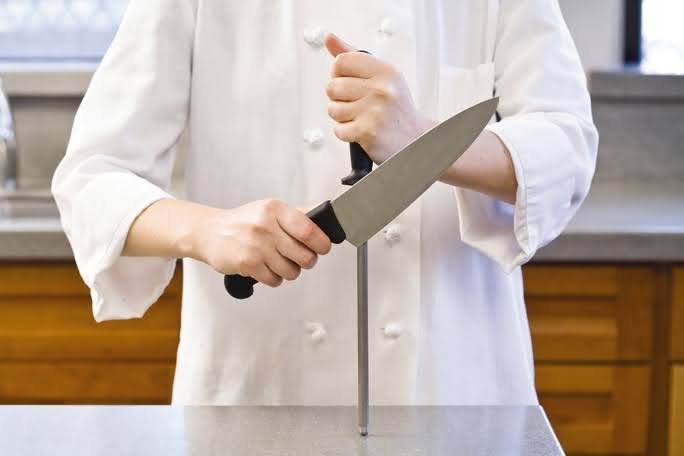
- Hold the rod correctly: Hold the rod vertically with the tip resting on a non-slip surface. Use your non-dominant hand to hold the rod.
- Position the knife: Hold the knife at a 20-degree angle to the rod. This angle is ideal for most kitchen knives.
- Sharpen the first side: Start at the base of the knife. Glide the blade down the rod, maintaining the 20-degree angle. Move from the base to the tip in one smooth motion.
- Repeat on the other side: Flip the knife to the other side. Repeat the gliding motion on the opposite side of the rod.
- Alternate sides: Continue to alternate sides, making 5-10 passes on each side. Ensure the angle remains consistent.
- Check the sharpness: Test the knife on a piece of paper. It should cut through smoothly without tearing.
| Steps | Description |
| 1 | Choose the right rod |
| 2 | Hold the rod correctly |
| 3 | Position the knife |
| 4 | Sharpen the first side |
| 5 | Repeat on the other side |
| 6 | Alternate sides |
| 7 | Check the sharpness |
Common Mistakes To Avoid
Even with a clear guide, mistakes can happen. Here are common errors and how to avoid them:
- Wrong angle: Holding the knife at the wrong angle can damage the blade. Always aim for a 20-degree angle.
- Too much pressure: Applying too much pressure can wear down the blade. Use gentle, consistent pressure.
- Inconsistent strokes: Inconsistent strokes lead to uneven sharpening. Maintain a steady motion from base to tip.
- Not alternating sides: Focusing on one side only creates an uneven edge. Always alternate sides with each pass.
- Not checking sharpness: Failing to test the knife can leave you with a dull blade. Always test on paper after sharpening.
- Dirty rod: A dirty rod can hinder the process. Clean the rod after each use to ensure optimal performance.
Avoid these mistakes to sharpen your knife correctly and safely. A properly sharpened knife makes cooking more enjoyable and efficient.
Testing Sharpness
Sharpening a kitchen knife with a rod can restore its edge and make cutting tasks easier. After sharpening, testing the sharpness is crucial to ensure the knife is ready for use. This process involves a few simple methods to check if the blade is sharp enough for your needs.
Visual Inspection
One of the first steps in testing your knife’s sharpness is a visual inspection. This method helps you identify any imperfections or dull spots on the blade. Follow these steps for a thorough inspection:
- Clean the Blade: Wipe the knife clean to remove any debris or residue. A clean blade is easier to inspect.
- Check for Reflection: Hold the blade under a bright light. A sharp edge will not reflect light, while dull spots will. Look for any shiny spots on the edge.
- Examine the Edge: Use a magnifying glass if necessary. Check for nicks, chips, or any irregularities. A smooth and even edge indicates a well-sharpened knife.
Use the table below as a quick reference for visual inspection signs:
| Inspection Point | Signs of Sharpness | Signs of Dullness |
| Light Reflection | No reflection | Shiny spots |
| Edge Smoothness | Even and smooth | Nicks or chips |
By carefully inspecting the blade, you can determine if it needs more sharpening or is ready for use.
Paper Test
The paper test is a practical and easy way to check your knife’s sharpness. This method involves cutting a piece of paper to see how smoothly the knife slices through it. Follow these steps for an effective paper test:
- Choose the Paper: Use a regular piece of printer paper. Avoid thicker paper or cardboard.
- Hold the Paper: Hold the paper at the top with one hand. Make sure it is hanging freely without support.
- Slice the Paper: Use the knife to slice through the paper from top to bottom. A sharp knife will cut through effortlessly, while a dull knife will tear or struggle.
Key indicators of the paper test:
- Effortless Cutting: A sharp knife will slice through the paper without hesitation.
- Clean Cut: The cut should be clean and smooth, with no tearing or jagged edges.
- Consistent Performance: The knife should perform well throughout the entire blade length.
Here’s a quick reference for the paper test results:
| Test Result | Indication |
| Effortless and Clean Cut | Knife is sharp |
| Tearing or Jagged Edges | Knife is dull |
The paper test is an easy and effective way to ensure your knife is sharp and ready for kitchen tasks.
Maintaining Your Knife
Keeping your kitchen knife sharp is essential for safe and efficient cooking. Using a rod to sharpen your knife is a quick way to maintain its edge. But knowing how to sharpen your knife is just part of the process. To extend your knife’s life and performance, you also need to practice regular maintenance and safe storage.
Regular Maintenance Tips
Regular maintenance of your kitchen knives ensures they remain sharp and functional. Here are some essential tips to follow:
- Clean after each use: Always wash your knife by hand with warm soapy water and dry it immediately to prevent rust.
- Use a cutting board: Always use a wooden or plastic cutting board. Avoid cutting on hard surfaces like glass or stone, which can dull the blade.
- Avoid the dishwasher: The dishwasher can damage the blade and handle of your knife. It’s best to wash it by hand.
- Regular honing: Use a honing rod to realign the edge of your knife after every few uses. This helps maintain its sharpness.
- Professional sharpening: Have your knife professionally sharpened at least once a year. This keeps the edge in top condition.
By following these simple steps, you can keep your kitchen knives in excellent condition, ensuring they perform well and last for many years.
Storing Your Knives Safely
Proper storage is crucial for maintaining your knives’ sharpness and safety. Here are some storage options to consider:
- Knife block: A knife block keeps your knives organized and protects the blades from damage. Ensure the block is clean and dry to prevent bacteria build-up.
- Magnetic strip: A magnetic strip allows you to store your knives on the wall, keeping them within easy reach and saving counter space. Make sure the strip is strong enough to hold the knives securely.
- Drawer insert: A knife drawer insert helps keep your knives separated and prevents them from knocking into each other. Look for inserts with slots that fit your knives perfectly.
- Blade guards: Blade guards or sheaths are ideal for those who prefer to store their knives in a drawer. They cover the blade, preventing it from dulling or causing accidental cuts.
Choose a storage method that works best for your kitchen setup and ensures your knives are protected and easily accessible. Proper storage not only keeps your knives sharp but also enhances kitchen safety.
When To Seek Professional Help
Sharpening a kitchen knife with a rod can be a handy skill. But there are times when you might need professional help. Knowing when to seek professional help can save you time and prevent further damage to your knife.
Signs Of Damage
It’s important to know the signs of damage that indicate your knife needs professional help. Here are some clear indicators:
- Deep Nicks and Chips: Small nicks can often be fixed at home, but deep chips might need professional attention.
- Blunt Edge: If your knife doesn’t cut smoothly even after sharpening, it may require professional honing.
- Bent Blade: A bent blade can be dangerous. Professionals have the tools to straighten it safely.
- Rust and Corrosion: If you notice rust spots, professionals can clean and treat the blade to prevent further damage.
- Uneven Edge: If the knife edge is uneven, it can be hard to fix without proper tools and skills.
Recognizing these signs early can prevent further damage and maintain your knife’s performance.
Finding A Professional Service
Once you decide your knife needs professional help, finding the right service is key. Here are steps to guide you:
- Research Online: Search for local knife sharpening services. Check their reviews and ratings.
- Ask for Recommendations: Friends or family who cook often may know reliable services.
- Check Experience: Look for professionals with years of experience. They are more likely to provide quality service.
- Compare Prices: Different services might have varying prices. Ensure the cost matches the quality of service.
- Visit the Shop: If possible, visit the shop. Check their tools and ask questions about their process.
Good professionals will have the right tools and knowledge to restore your knife efficiently. Make sure to choose a service that meets your needs and budget.
Frequently Asked Questions
What Is A Knife Sharpening Rod?
A knife sharpening rod is a long, thin tool. It helps keep knives sharp.
How Do I Hold The Knife And Rod?
Hold the rod in one hand, knife in the other. Keep a firm grip.
What Angle Should I Use To Sharpen?
Use a 20-degree angle. This helps maintain the knife’s edge.
How Often Should I Sharpen My Kitchen Knife?
Sharpen your knife every few weeks. It depends on usage and type of knife.
Conclusion
Sharpening a kitchen knife with a rod is simple and effective. Follow these easy steps. Hold the rod steady. Maintain the right angle. Swipe the blade smoothly. Repeat on both sides. Practice makes perfect. Sharpening regularly keeps your knives in top shape.
Enjoy cooking with sharp, efficient knives. A sharp knife improves your kitchen experience. Keep your tools ready and safe. Happy cooking!

Sebastian D’souza is a leading expert in home and kitchen appliances, dedicated to transforming everyday living with high-quality, stylish, and innovative solutions. As the founder of De Studio Home, our passion for design and functionality, sustainability drives us to curate the best products for modern homes. Our commitment to excellence ensures that every customer enjoys a perfect balance of practicality and elegance in their living spaces.